// messaging, voice & maps over Reticulum
Columba

>_ Columba Quick-start

Installing Columba on Android, getting it onto the network — over TCP or a LoRa RNode — and finding your way around its settings.

00

Getting Columba

Columba is a full-featured Reticulum client for Android — messaging, voice calls, a shared map, and direct radio links all in one app. Like the rest of the ecosystem it isn't on any app store; it's distributed as an APK from the project's releases page.

Grab it from the Columba releases on GitHub. Install the latest beta, choosing the freshest Python backend (official-rns-py) build — that's the one the author recommends.

Since the APK doesn't come from Play Store, Android will ask for permission to install from this source the first time — allow it for whichever app you downloaded through (browser or file manager).

On first launch Columba asks for an account name and a few permissions. Fill those in and you land on the main screen, with Chats, Contacts, Map and Settings along the bottom. Everything below lives under Settings — the gear at the bottom-right.
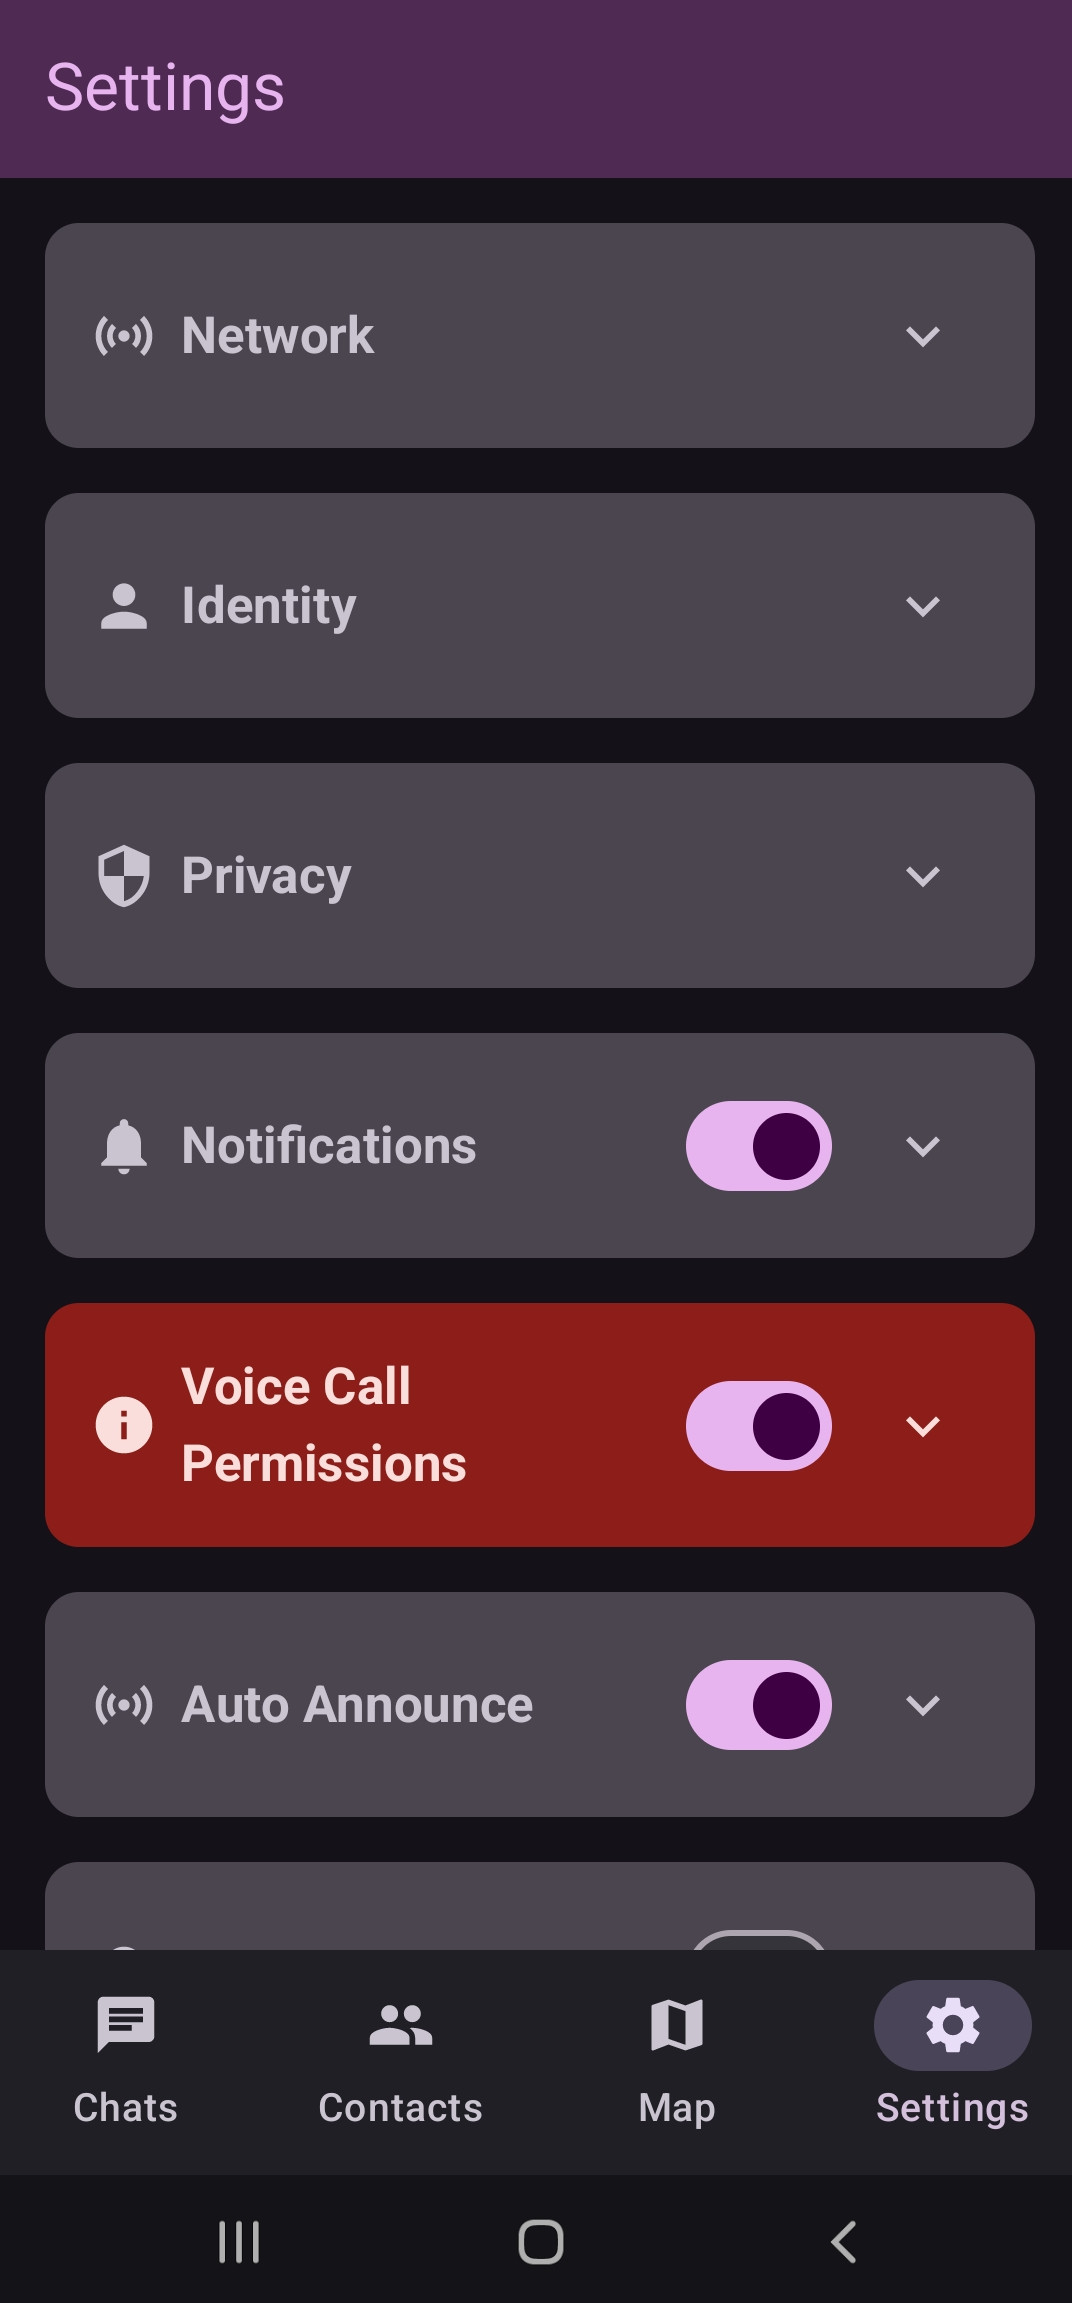
Columba Settings screen — Network, Identity, Privacy, Notifications, Voice Call Permissions and Auto Announce sections, with Chats / Contacts / Map / Settings tabs along the bottom
The Settings screen — every section in this guide opens from here.
01

Connecting via TCP

To reach the wider Reticulum network, Columba needs a connection to a transport node, and TCP is the simplest way there from a phone with internet. In Settings → Network you can monitor the network and manage every interface Columba supports.

Tap Network to expand it. View Network Status shows the state of the RNS service, active interfaces, and BLE connections, and lets you send a test announce. Manage Interfaces is where connections are added and edited — open it.
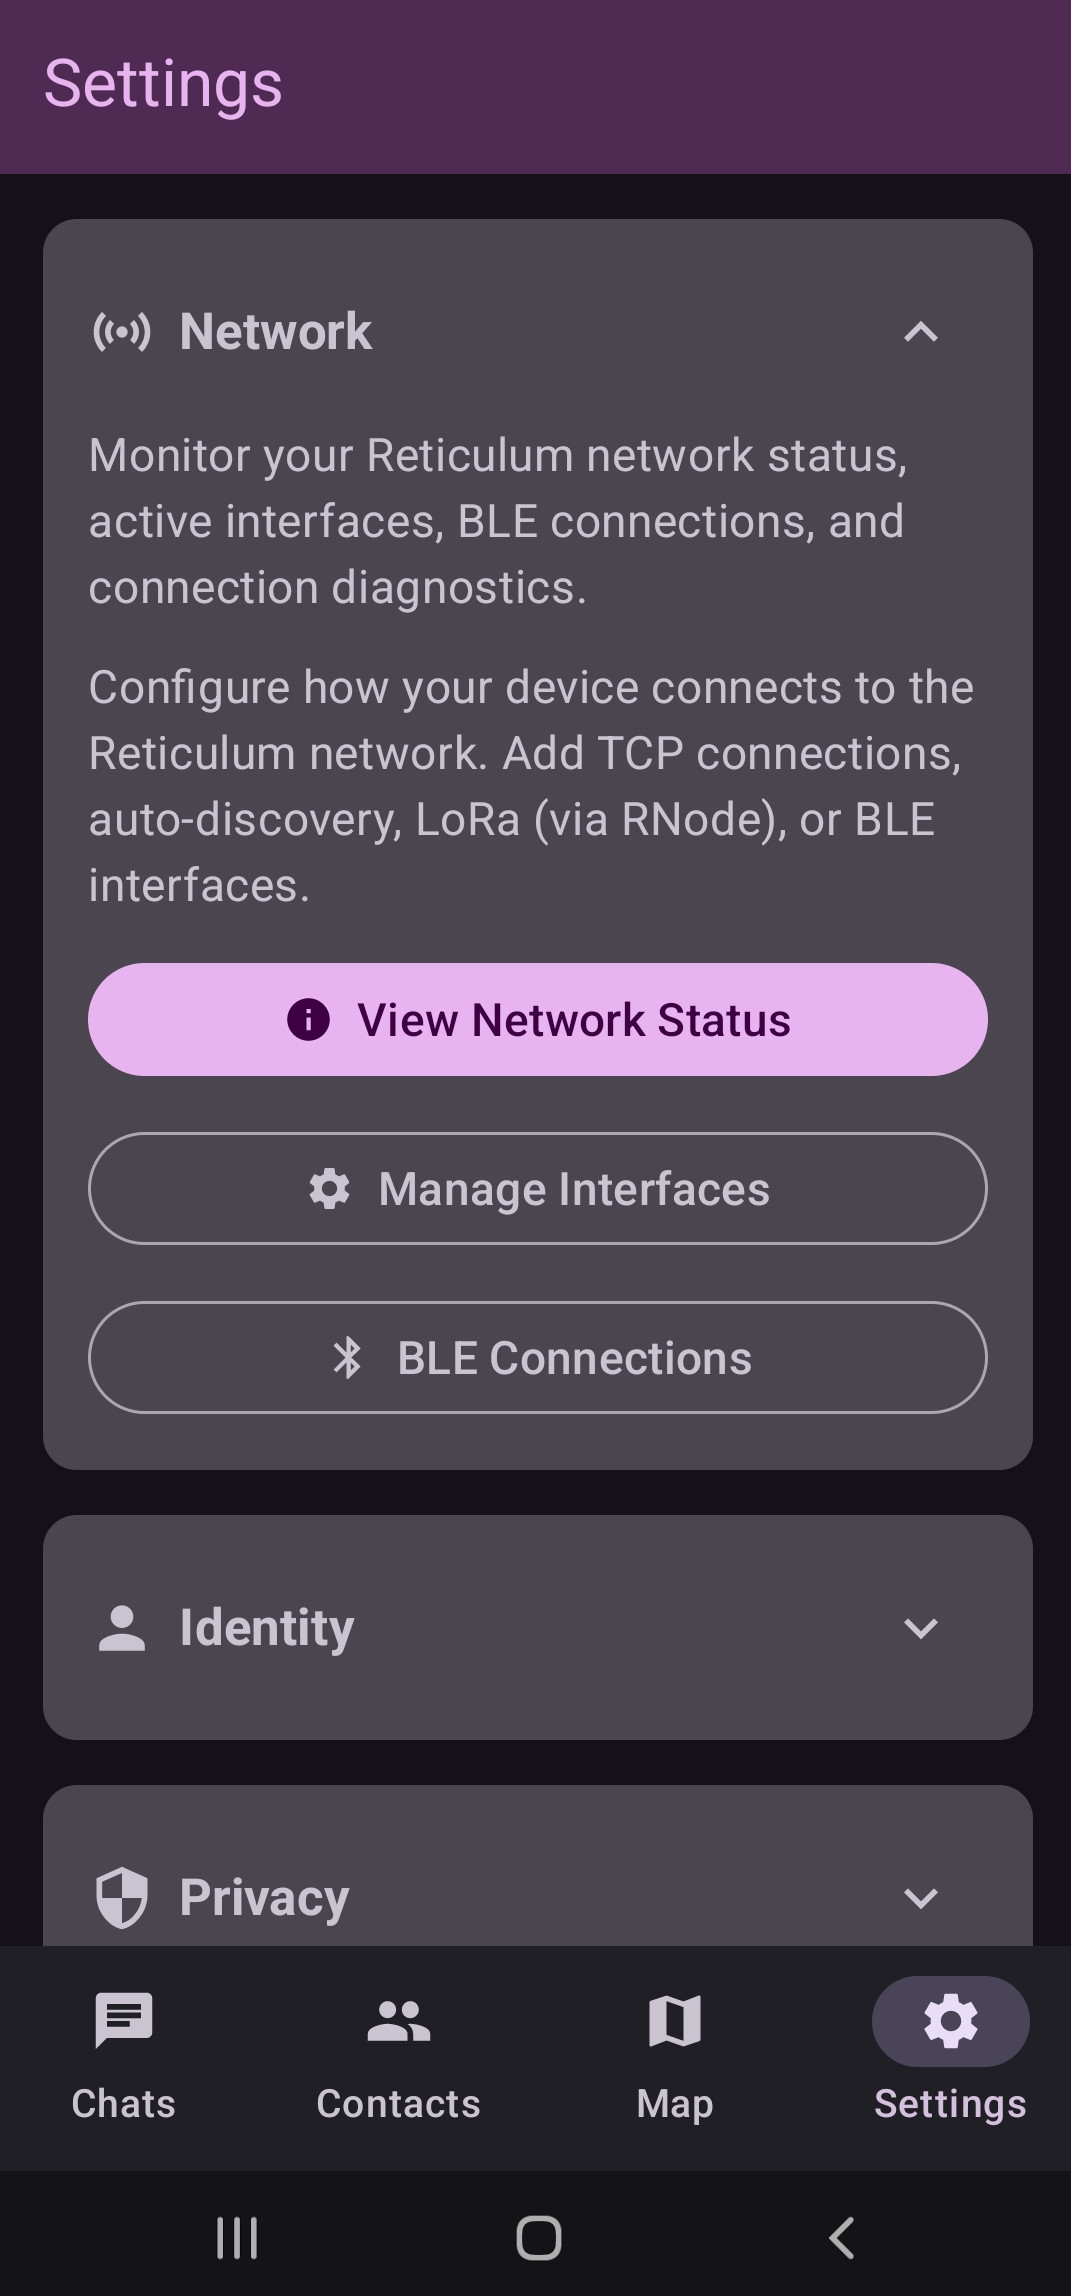
Columba Network section expanded — View Network Status, Manage Interfaces and BLE Connections buttons
Network expanded — View Network Status, Manage Interfaces, BLE Connections.

The interface list shows what's already configured, with an Enabled / Total count up top. To point one at the Moscow hub, long-press an interface and choose Edit interface from the popup (or tap the + at the bottom-right to add a fresh TCP Client). Scroll the preset servers to the very bottom, pick Custom, and tap Next.
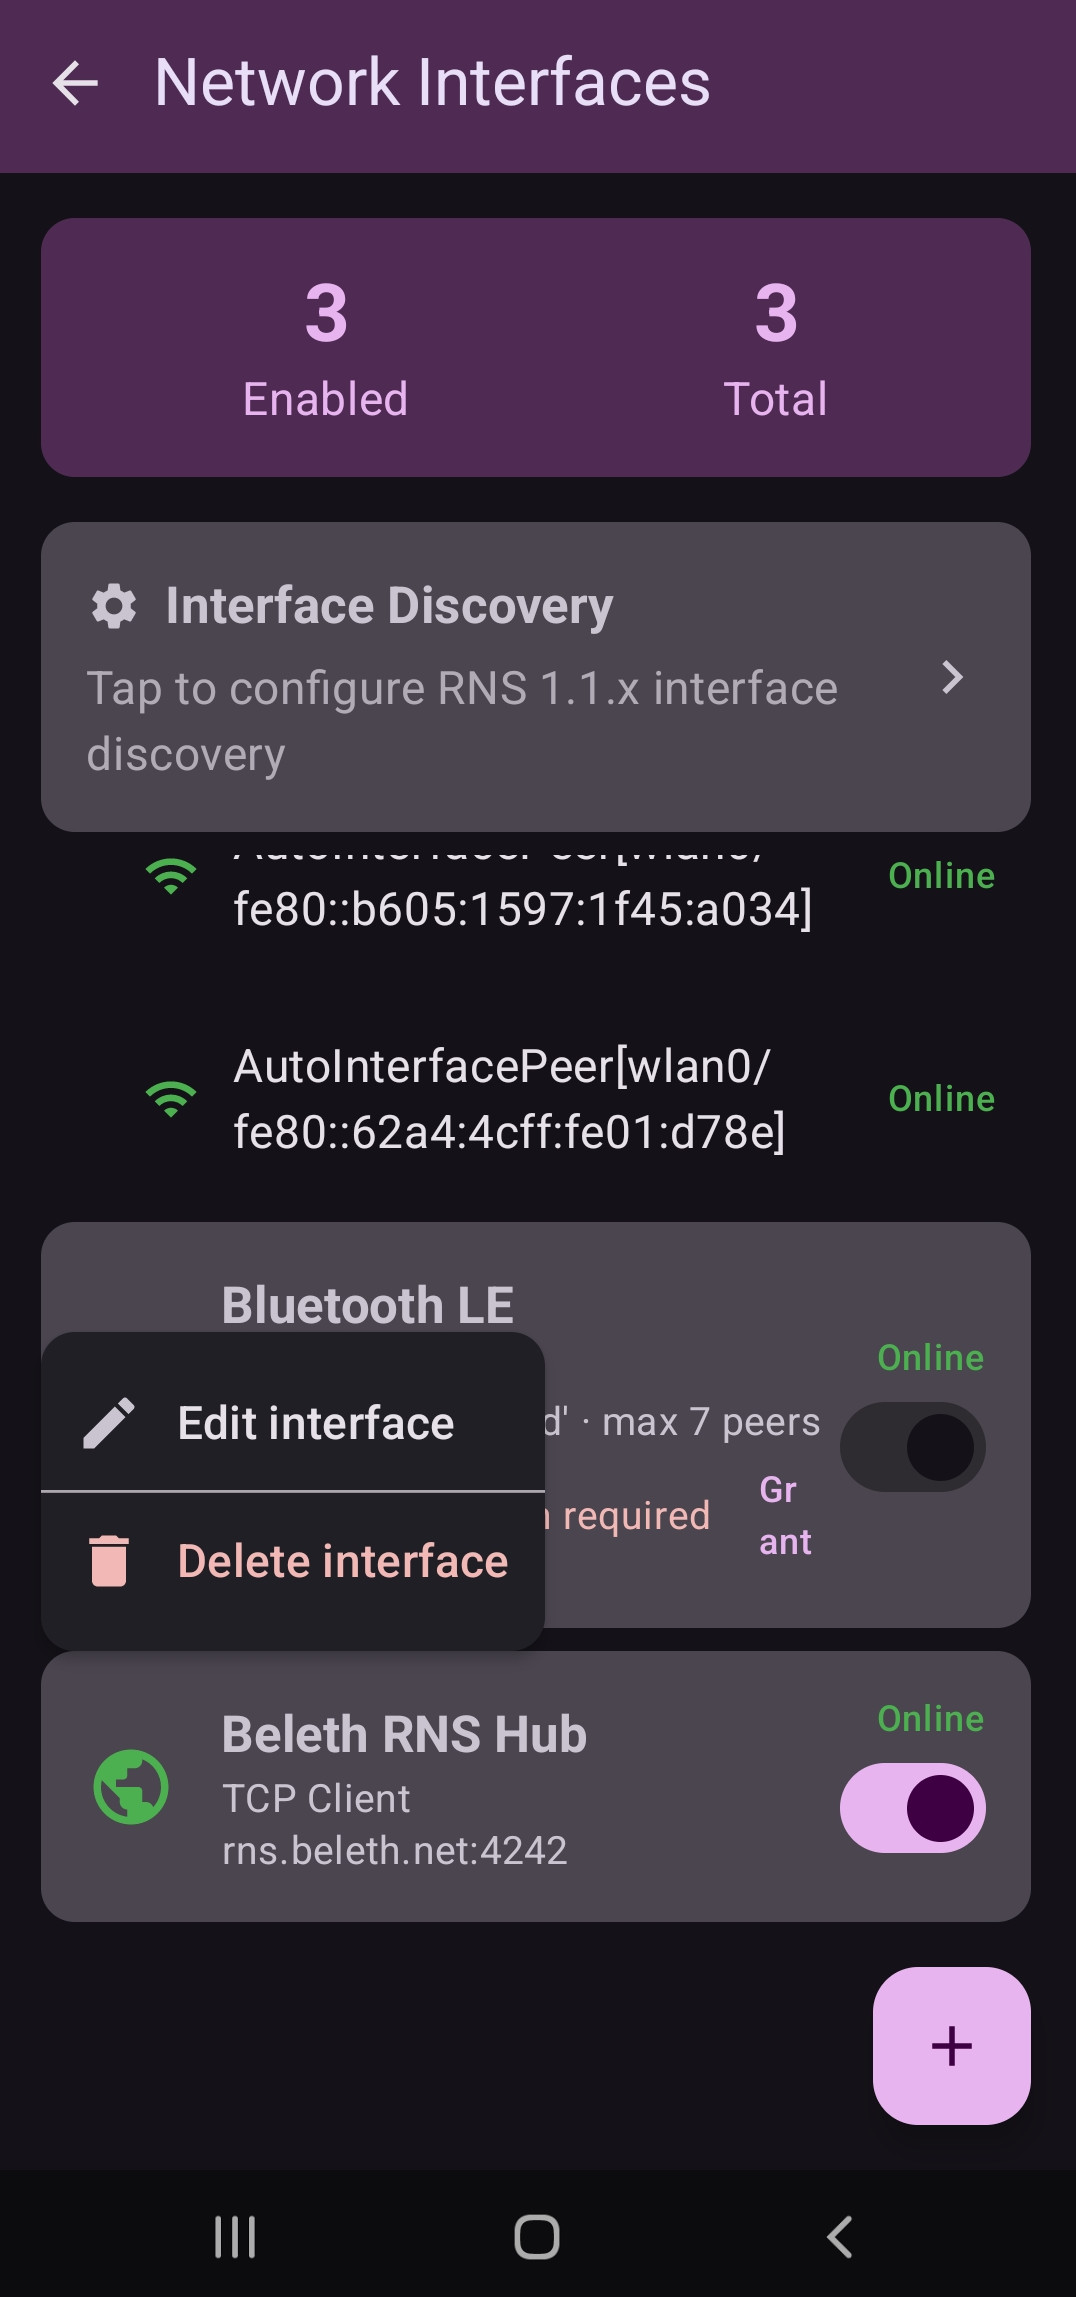
Columba Network Interfaces screen — 3 Enabled / 3 Total, Interface Discovery, auto-discovered peers, a Beleth RNS Hub TCP Client entry, and a long-press popup showing Edit interface and Delete interface
Long-press an interface for Edit / Delete — or the + button to add a new one.

On the Custom server screen, fill in the fields and tap Save:

Interface Name
Any label you like — e.g. tcpmow. It's just how the interface shows up in your list.
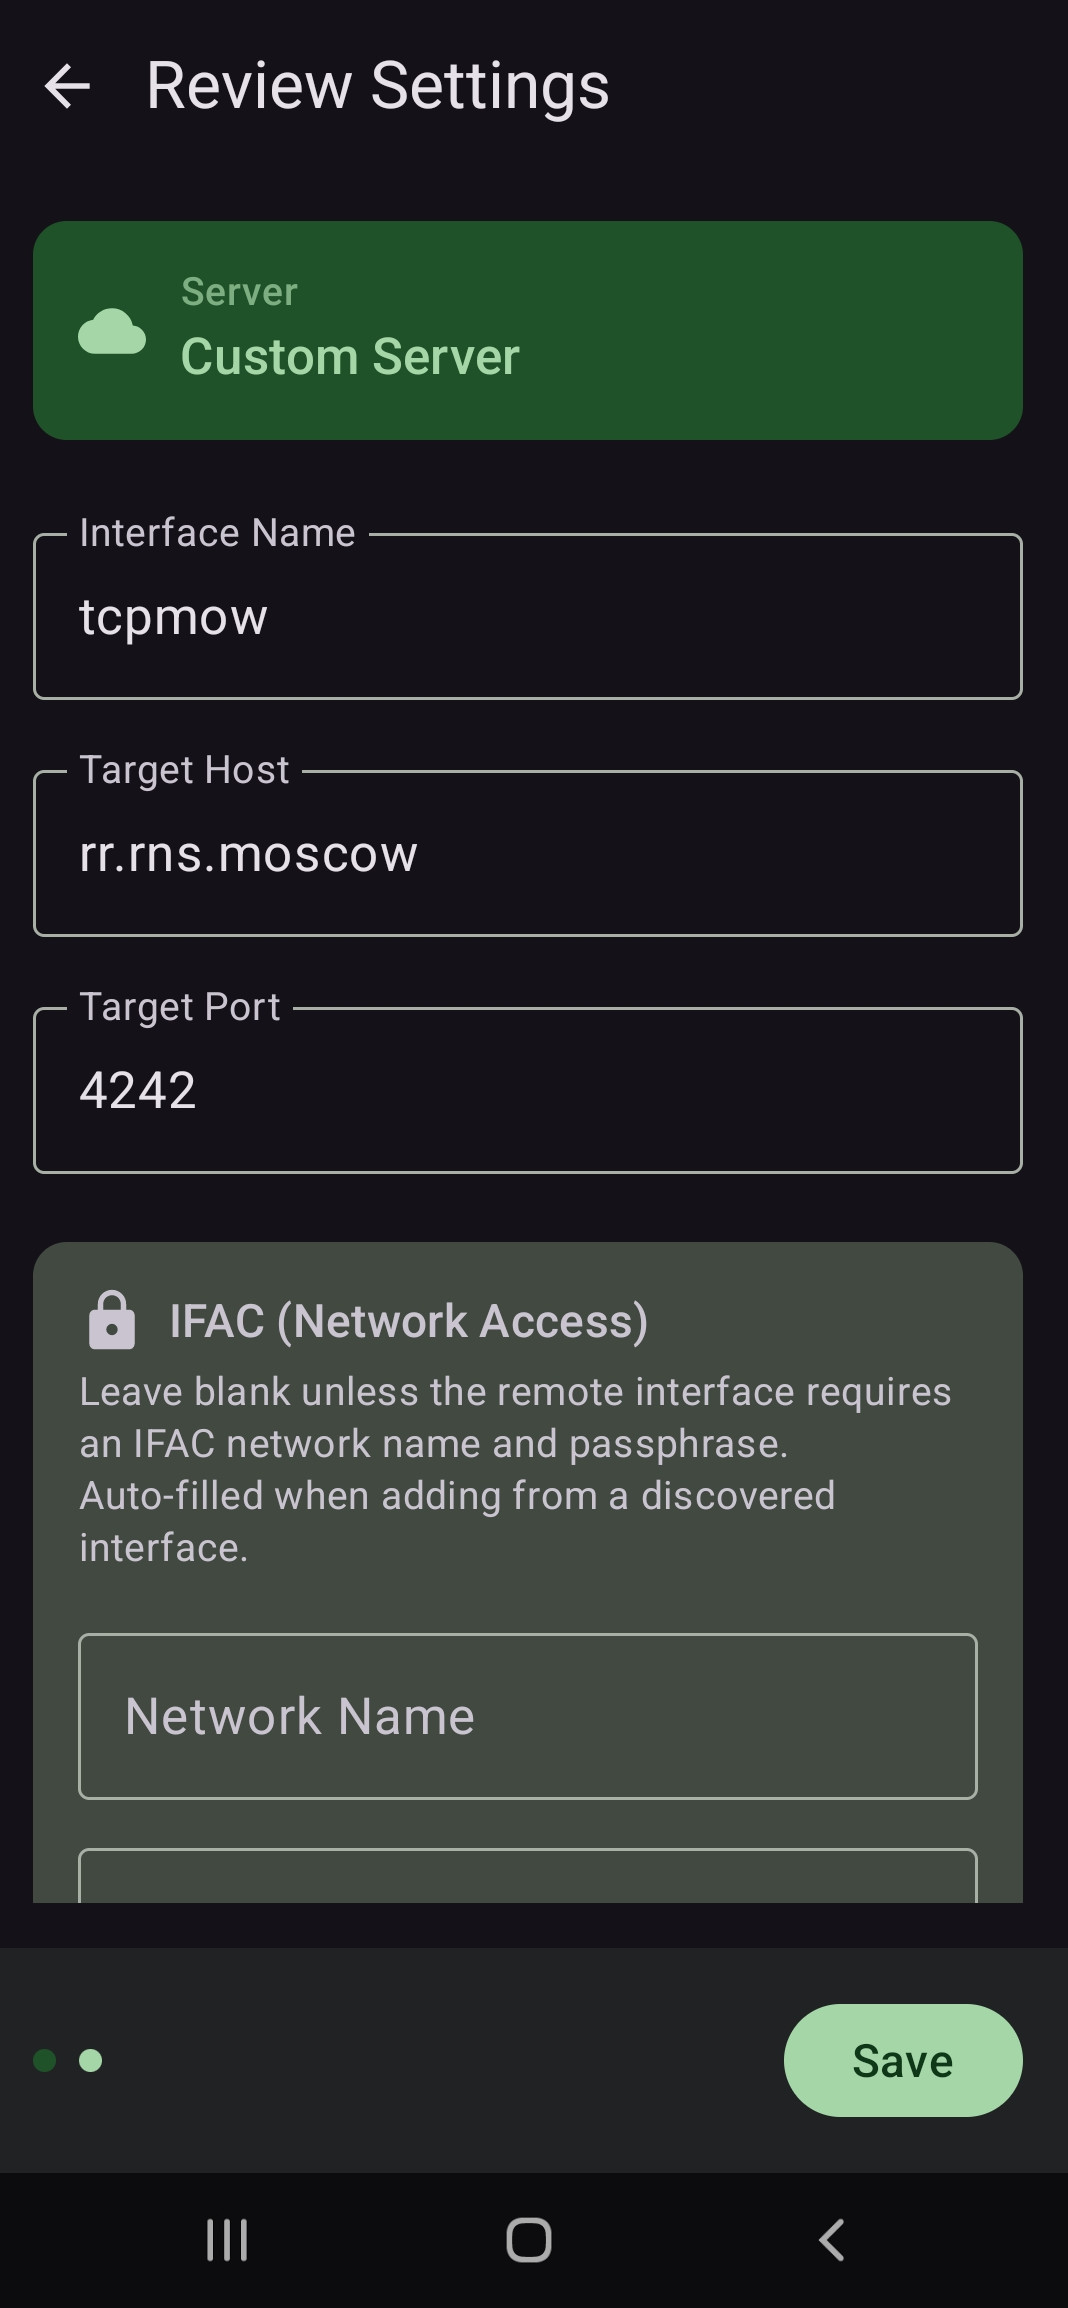
Target Host
rr.rns.moscow — the RNS.MOSCOW entry point.
Target Port
4242.
IFAC (Network Access)
Leave blank — the public hub doesn't require an IFAC network name or passphrase.
Columba Review Settings screen — Custom Server with Interface Name tcpmow, Target Host rr.rns.moscow, Target Port 4242, IFAC left blank, and a Save button
Custom Server — host rr.rns.moscow, port 4242, IFAC blank. Save, and you're on.
rr.rns.moscow:4242 is a round-robin hostname — it resolves to a random node from the list below, so it's the easiest single address to type in. If you'd rather pin a specific node (e.g. because one is closer or more stable for you), use its address from the live list instead.
No internet, no RNode? Columba can also message directly over Bluetooth LE — up to 7 peers, no extra hardware needed. Range is short, but it's a genuine off-grid link between nearby Columba users. Manage it from the same Network screen.
02

Connecting via RNode

If you have a supported LoRa device, Columba can drive it directly as an RNode — for peer-to-peer radio messaging, or to reach the network with no internet at all.

First, the device has to run the RNode firmware. Flash it at flasher.rns.moscow; when it's done, enable Bluetooth on the device and put it into pairing mode — the Flasher walks you through both.

Back in Columba, go to Settings → Network → Manage Interfaces and tap the + at the bottom-right. The Select Interface Type sheet lists everything Columba can add — Auto Discovery, TCP Client, Bluetooth LE, RNode LoRa, and more under Advanced. Choose RNode LoRa.
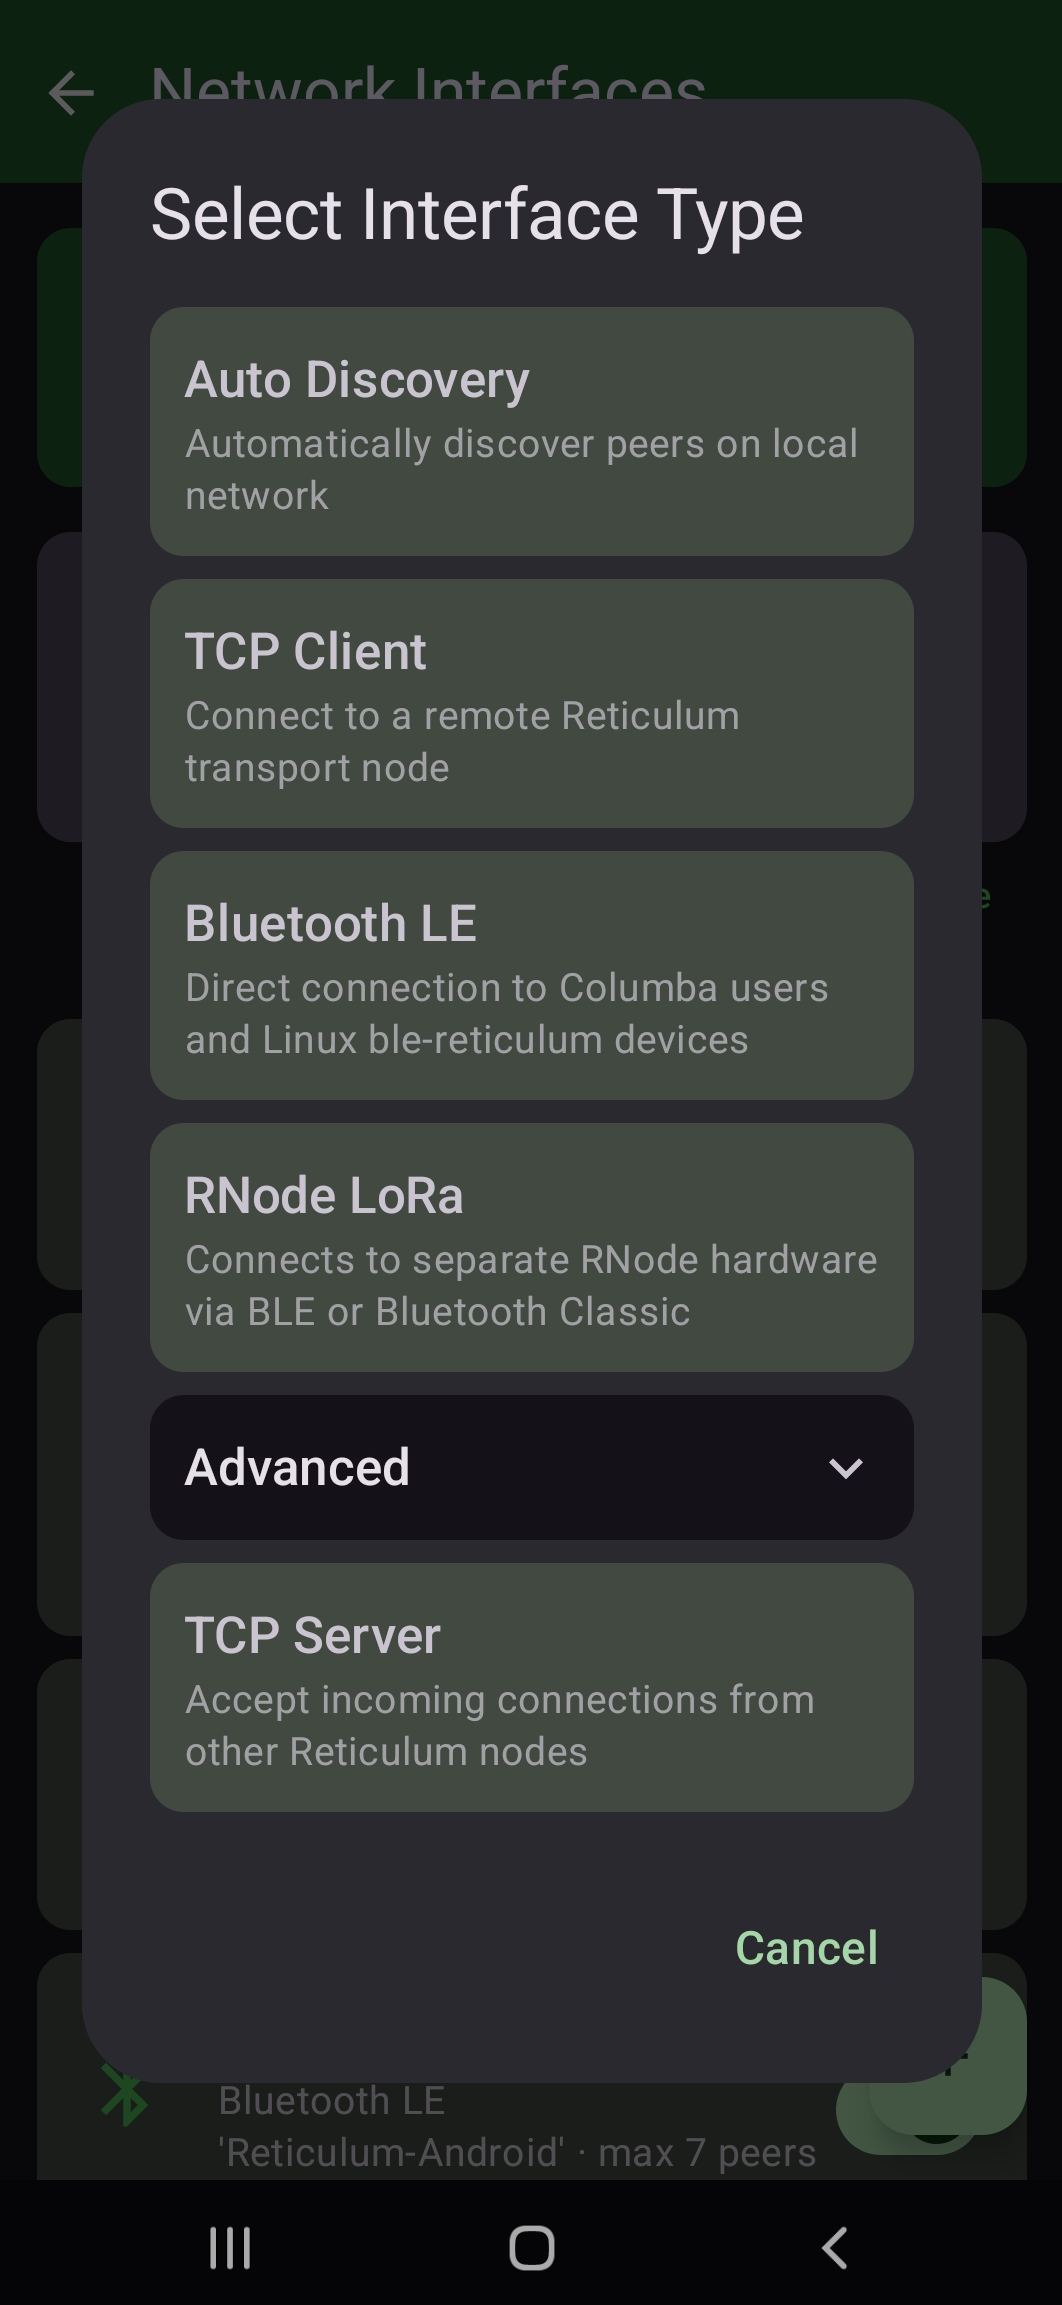
Columba Select Interface Type sheet — Auto Discovery, TCP Client, Bluetooth LE, RNode LoRa, Advanced and TCP Server options
Select Interface Type — RNode LoRa connects to a separate RNode over BLE or Bluetooth Classic.

Find your device in the list and tap it, then confirm the numeric code shown on the device's screen (or on the Flasher page) to pair. Once paired, Columba offers to configure the radio.

Region & radio parameters

The Choose Region step offers ready-made frequency plans, but for the RNS.MOSCOW network you set the parameters yourself: scroll to the bottom, pick Custom Settings, and tap Next.

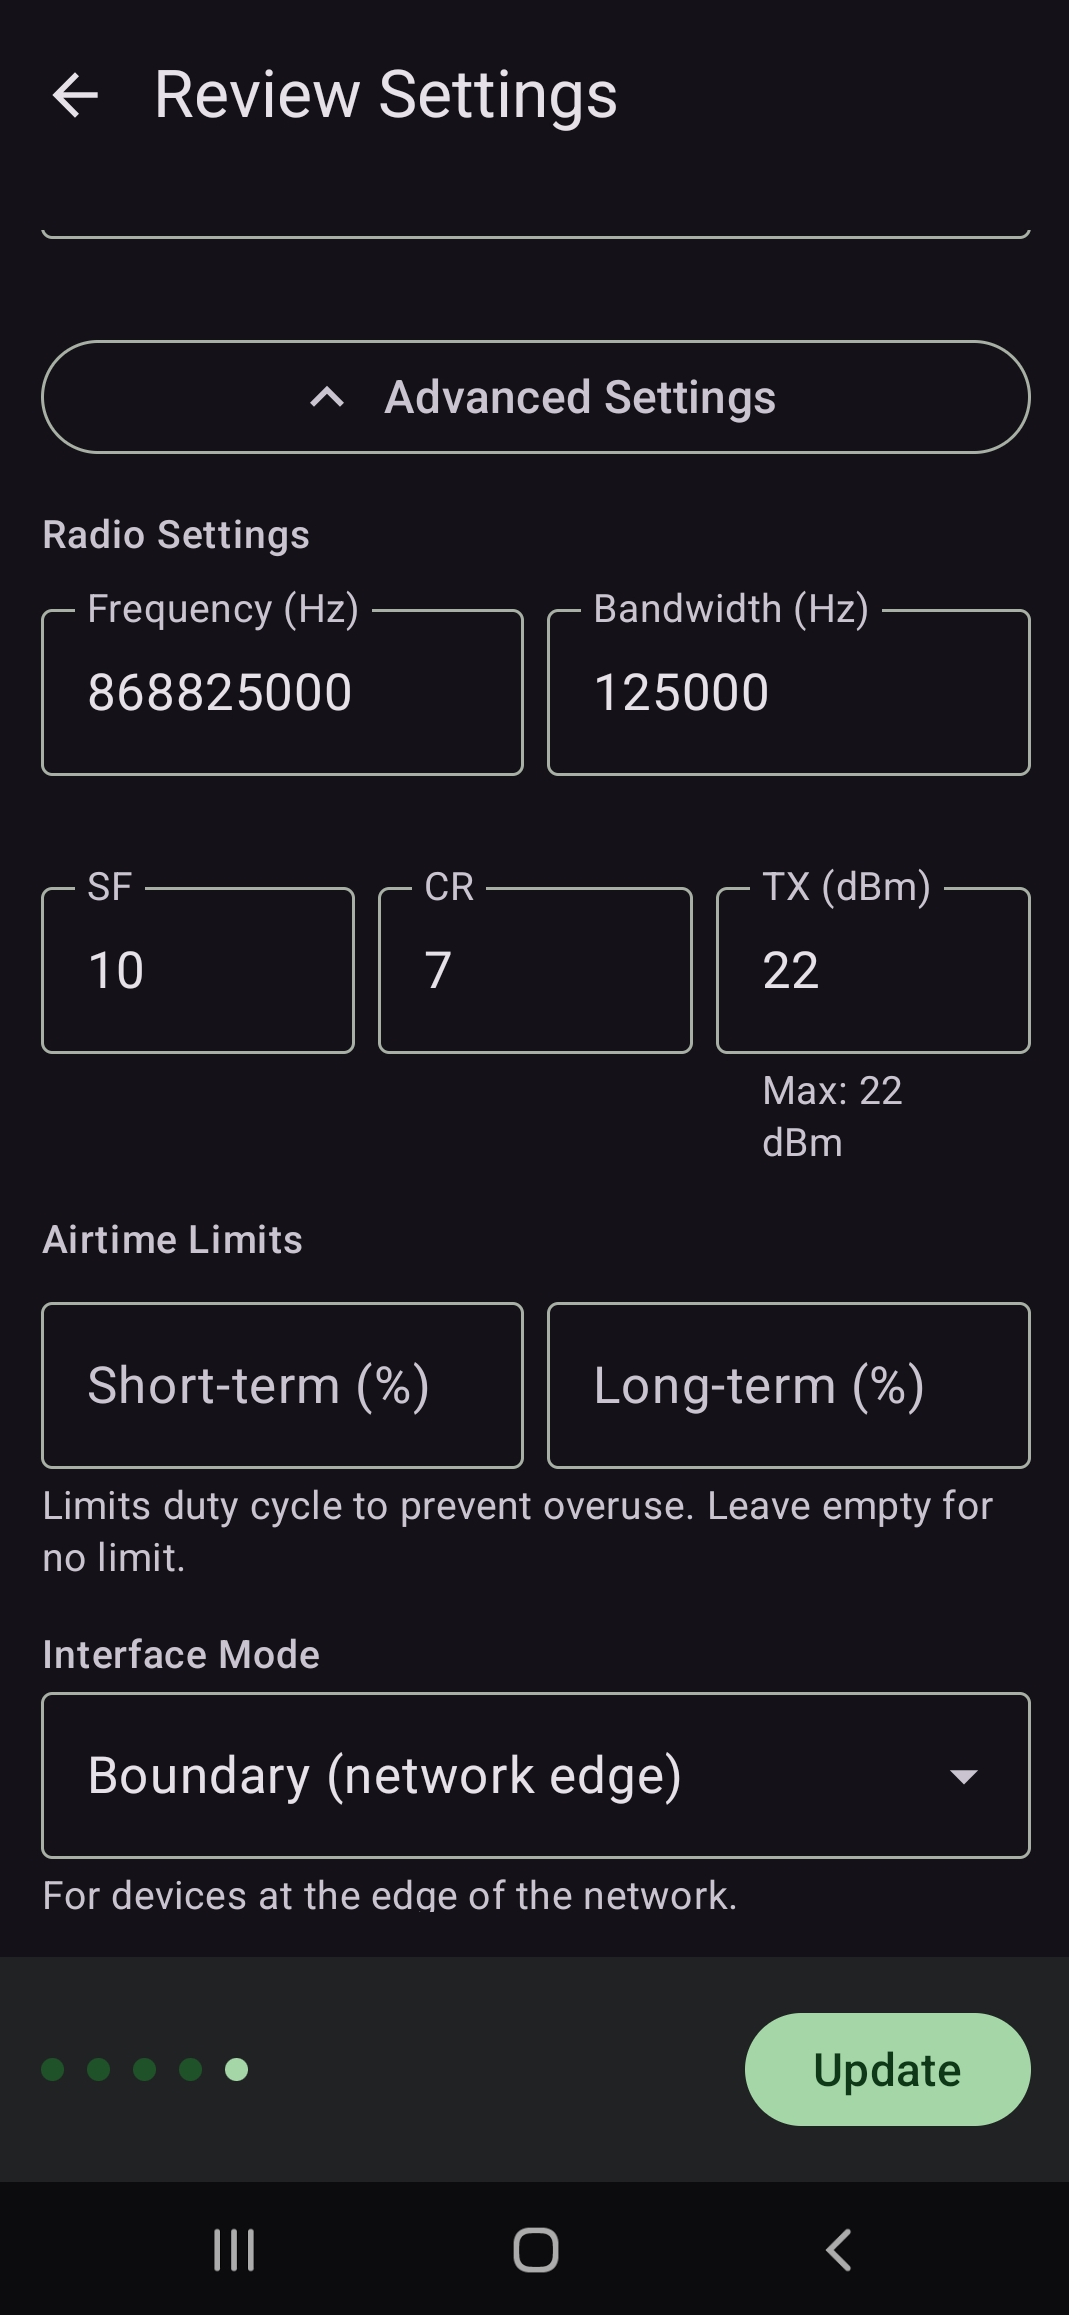
On the radio screen, enter the Moscow values. For two RNodes to hear each other every field has to match on both ends, except TX power, which can differ.
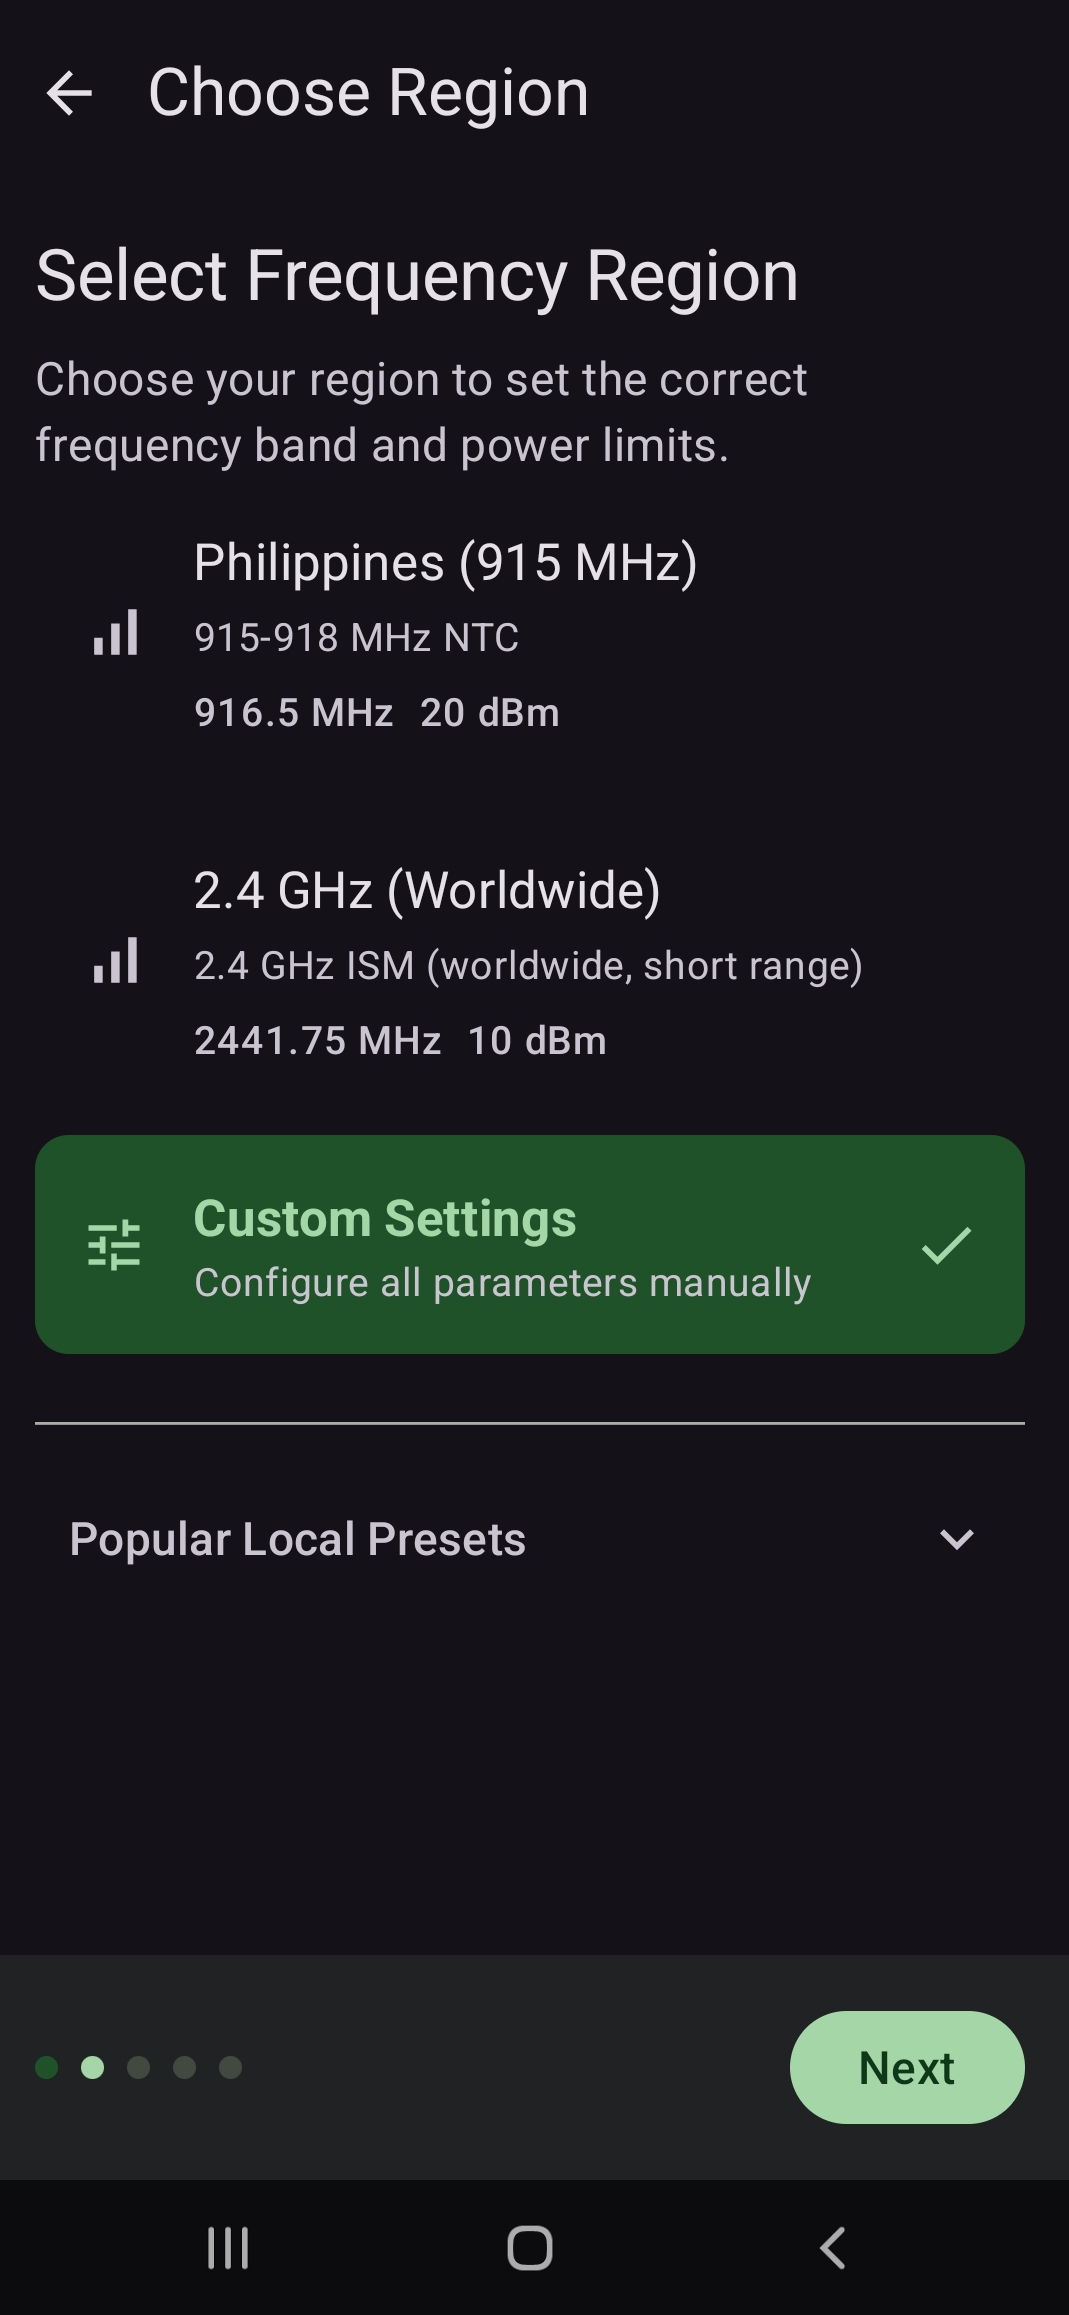
Columba Choose Region screen — frequency region presets with Custom Settings selected and a Next button
Choose Region — scroll down and pick Custom Settings.
MODE Frequency Bandwidth SF CR
LoRa 868.825 MHz 125 kHz 10 7
Columba's radio fields are in Hz, so enter 868825000 for the frequency and 125000 for the bandwidth. Same numbers as the RF Parameters table on rns.moscow — if you're in another city, use that network's values instead.
TX power is per-device: different RNodes allow different maximums, and Columba shows the ceiling right under the field (22 dBm on the device pictured). At the very bottom, you can turn off Display Logo on RNode so the app logo doesn't cover the device's screen while it's working. Tap Save — and your LoRa device is ready.
Columba Review Settings radio screen — Frequency 868825000 Hz, Bandwidth 125000 Hz, SF 10, CR 7, TX 22 dBm (Max 22), Airtime Limits, and Interface Mode set to Boundary
Radio Settings — Frequency 868825000, Bandwidth 125000, SF 10, CR 7, TX at the device max.
03

Settings, section by section

Beyond Network, the Settings screen is a stack of expandable sections. Defaults are sensible, but here's what each one is for.

Identity
Your account — change your name, avatar and see your full address. Manage Identities saves your identity to a file or restores it from a file or key. That key is your passport in Reticulum: keep it safe, and you can import it into other clients to be the same person everywhere.
Privacy
Block messages and calls from strangers — anyone not in your contacts — and review the list of blocked users.
Notifications
Choose which events notify you: any incoming message, a message from a contact, an announce you've seen, or a Bluetooth connection.
Voice Call Permissions
Grant the system permissions Columba needs before you can make voice calls.
Auto Announce
Set how often Columba tells the network you're online and reachable for messages and calls.
Location Sharing
Defaults for putting yourself on the map — for individual users, for groups via an external host, or by hosting one yourself. Set up a group of friends and everyone can see each other's location.
Map
Settings for the map view itself.
Message Delivery & Retrieval
How messages are sent by default — directly or via a relay — plus whether the relay is picked automatically or from a known/trusted list, how often it's polled, and incoming size and sorting. A relay stores messages while the recipient is offline and hands them over once they reappear.
Image Compression
How hard images are compressed before sending. On slow links, image size makes a real difference to delivery speed.
Theme
Tune the interface colours to your taste.
Battery & Background
Keep Columba running in the background on your Android so messages still arrive while the phone sleeps and you stay reachable.
Data Migration
Back up all your chats, contacts, settings and identity to a file, and restore them. Make a backup before every Columba update — with one, you can always get everything back.
Share Columba
Hand the app to someone over WiFi — they scan a QR code and get Columba onto their own phone.
RNode Flasher
Flash a LoRa device straight from the phone by plugging it into the USB port.
Under Identity → Manage Identities, export your key somewhere safe before you do anything else. It's the one thing you can't regenerate — lose it and you lose your address and every conversation tied to it.
04

Transport & instance sharing

Two switches under Advanced turn your phone from a plain client into part of the network's plumbing. Leave them off for normal use; turn them on deliberately.

Transport Node
When you have internet and a route into Reticulum, and others connect to you over radio interfaces — LoRa, HaLow, ESP-NOW, BLE, WiFi — this lets them reach past your local link into the wider network. It works like a proxy: peers get to the global Reticulum through you.
Share Instance
Opens a port so other Reticulum programs on the device can connect and use the RNS instance Columba is already running, instead of each starting its own. A wardriver can report your track through it, another messenger like Sideband can ride along — anything Reticulum-based.
RNS is battery-hungry — you'll feel it in your phone's runtime. One running instance shared across apps beats several fighting each other, so Share Instance is the friendlier way to run multiple Reticulum tools on one device.

← All guides